Tuesday, July 31, 2012

Mackinac City/Soo Locks Vacation

This past weekend, we trekked up the 5 or so hr drive to Mackinaw City and Sault St. Marie, MI for our little summer getaway. It was only overnight, since at this age, it's about all we the kids can handle.

Ready for the road trip!

Thank goodness for snacks and dvds...


We left early Friday morning (around 6/6:30) and finally got up there around 10:30/11. Since it was too early to eat, we let the kids play around on a HUGE play structure on the coast in St. Ignace, just over the Mackinac Bridge. They had a blast! It was perfect since we were the only ones there, which gave them pretty much free rein of the place.
 
Happy boy!
Conversations over lunch
They didn't know where to start!
The family

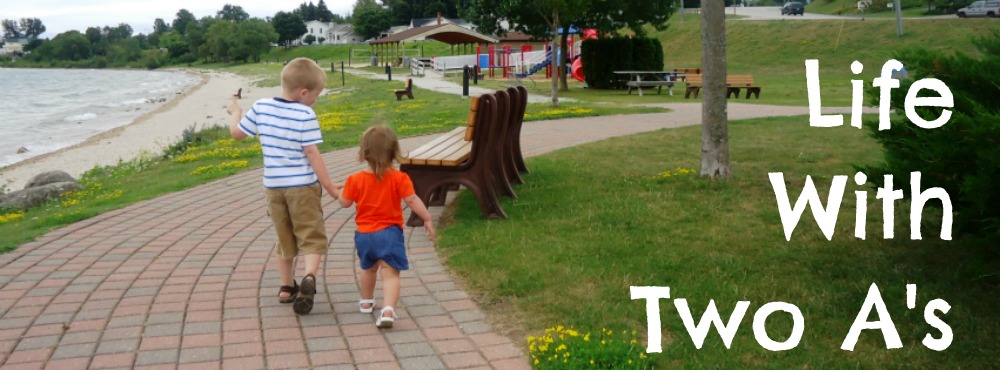
"Do you see that water over there Ava??"
 After lunch, we went another hour up to Sault St. Marie where our hotel was and walked downtown to the Soo Locks. We tried to see the huge freighters but in the end due to timing, just ended up hanging out, eating ice cream, and walking in all the little shops.

Aiden calls this "the trailer" because it reminds him of a trailer hitch

Hanging Out

This was, unfortunately, the only boat we saw... no big freighters

That night went fine, it was Ava's first time sleeping away from home (other than when she was a little little baby) and she only woke up once crying. With a little Mama cuddling time, she was back asleep for the rest of the night. In the morning, we went to Lake Michigan in the UP before we went over the bridge, and I think both kids could've stayed all day... Ava absolutely LOVED the water, we were waiting for her to jump right in. And again, we were the only ones there, which was perfect!

On Lake Michigan
Water Baby

Building sandcastles
And finally, we walked around downtown Mackinaw City for a bit, then on to the water again for one final look at the bridge. Once we left, ate lunch in the car and finally got home around 5pm. Both kids crashed HARD that night... I think J and I did too... it's exhausting, I can't imagine going for longer than overnight!!

"Hey, get back here!!"

Thursday, July 26, 2012

Finished Chair

Remember the horrible "before"?
If you read the last post on the ugly wing back chair, you'll definitely want to see the after! My in-laws found this chair at a garage sale for $20, but decided against buying it. However, on their daily walk, they later found the chair out on the curb marked for FREE! They had to pick it up, especially since they later found out it was an Ethan Allen chair. Not bad for free... It did have some rain damage from being left outside for awhile, but once it was dried out and torn apart, I sprayed the foam and batting with Lysol and it seemed (hopefully) as good as new! My Mother-in-Law stripped and re-finished the legs before they handed it over to me.

The more re-upholstering projects I do, it's becoming a much faster process and a lot easier for me.

To remind me how to put it back together...


 And... here's the after:


Arm detail


Someone else enjoyed it... He told me he didn't want Aunt Sarah to take it home...
So, unfortunately the chair won't stay here, but I love the way it turned out - I hope they'll love it as much as I do! Anyone else have a project they need re-finished?? I'm here for ya! 

Sunday, July 22, 2012

Busy Work

Here's a look at the "before" of what I've been working on for the past week or so... I hope to get it finished within the next few days, and will be sharing the process and the story behind it soon!

It'll look much better when it's done, I promise!!

Monday, July 16, 2012

New Pleated Purse

To go along with all my new projects, I of course had to showcase the new purse I made. I was looking for something to make that was large enough to carry kids stuff (snacks, toys, diapers, etc) without making it look like a typical diaper bag. I also hated changing my purse every time I went somewhere without the kids, so I was on a mission to make my own in an effort to save money (some of those bags are EXPENSIVE!). This way, I was able to customize it to my own tastes as well.... Here was the tutorial I used; every step was perfectly described/detailed and it was so easy to do. Visit Warehouse Fabrics, Inc. for the tutorial.

The finished project
 Instead of using the snap as in the tutorial, I used magnet clasps because they were cheaper (and easier to put in I thought). There were a few places where my sewing machine wouldn't go through since I just have a basic machine, but I think it worked out okay. If I had a dedicated amount of time to work on it, instead of just nap times and after the kids went to bed, I probably would've finished it in a day... but all in all, it took me a few days, not too bad!

Inside

I made a pocket for my phone on the right, and then a larger catch-all on the left.

Another pocket, for keys, hand sanitizer, etc.

Friday, July 13, 2012

Library Tote

When we moved here a few years ago and joined the local library, we were told about a program called "Raise a Reader" in which children 0-24 mths are eligible to receive a new book (so far, all board books) each month. When we signed up Ava for the program, she was given a new tote bag that we could put our books in when we came to check out new ones. Since Aiden is the only one checking out the books these days, he is using the tote.... and some of the kids books are HUGE! We were getting to the point where we could only fit a few books in the tote at a time, and had to put the rest in my purse just to carry them home. It was also difficult for Aiden to put his books back in the bag once he was done reading them because the bag was so small. Enter Make It and Love It . I've mentioned this site before and I can't get enough of her projects - she makes great tutorials! I found this bag and thought it was perfect for our Library books!

I made one minor addition to the bag; a little pocket for our library card. I'm always fumbling for the card when it comes time to check out since I've got Aiden, Ava and a load of heavy books, so I figured it made sense to add it to the bag. In mine, I attached the pocket with Velcro since I forgot to sew it in place before I finished the bag in case I needed to take it out. I used a canvas/duck cloth for the exterior because it's much stronger than regular fabric and the books usually get very heavy. So what do you think?

The finished bag

Nice, large opening to fit his BIG books

Card Holder

Interior

Thursday, July 12, 2012

My Etsy Shop

I made a crayon roll for Aiden to take with him to church since we were previously using a Ziploc bag (the box the crayons came in ripped). For those of you that don't know what they are, they're essentially a fabric holder with a slot for each crayon, that rolls up for easy transportation.


I of course, found the idea on Pintrest. However, the only tutorials I found were for rolls that held 8-16 crayons... and he had 23 (we lost one somewhere, probably broke). So, I decided to make my own to hold 24 crayons based on the smaller ones I found. My in-laws suggested I sell them at craft shows that they go to/sell things around Christmas time, so in addition to that, I took it a step further and opened my own Etsy shop! I've only made 6 so far (not including the one for Aiden) and hope you can take a look!!

Cute, huh?

I'm always open to trying new projects, and probably be featuring other items here as well... bags, totes, organizers, etc. Visit me & buy something: E's Homemade Goods.

Wednesday, July 11, 2012

My Sweet Boy

So Aiden has been doing A LOT of puzzles lately, it's become his new obsession. Must be the mini-engineer mind at work. And because he's been doing so many, he has become quite good at it... Every time he finishes one, he's so incredibly proud of himself, and I may have been laying on the compliments a little thick.

One of his favorites!

This afternoon after lunch, he was off doing a puzzle (surprise, surprise) while Ava was finishing her food. When he heard me cleaning her up and putting food away, he rushed out and ran over to her and said, "Good job Ava! You finished your lunch!! I'm so proud of you - Good Job!!" and then gave her a unnecessary amount few hugs and kisses, then ran off to finish his puzzle. I suppose this is a good thing he's repeating this and not some of my other phrases/comments?? I hope this level of love continues towards his sister as he gets older!

He LOVES his little sister!

Sunday, July 8, 2012

Re-Upholstering Puzzles - Part 2

The second chair we found at an estate sale needed serious help as it was straight from the 1980s... or at least had the look...

Again, we went to JoAnn's and found some fabric and started on the project. This time around, I made sure to take as many pictures as possible, even if I didn't look back at them to reference, at least I had them. In this chair, we also decided to change it a bit and take off the skirt at the bottom and just have the fabric wrap under the chair. That took a little extra time, trying to figure out how to attach it together without making it look obvious that we changed it. I ended up using nail trim/decorative brads, on the corners and up the back.

Horrid tack strips on each side


One of the biggest problems I came across was using the tack strips that were on the chair originally. Every time I tried to put them back in, the metal teeth bent and/or broke off and therefore were rendered useless... such a PITA. This is where the decorative nail trim came in, other than the fact that they were extremely hard not to break when you try to nail them in.


All in all, I would definitely do another chair (actually I am, but this one won't be for me). Seeing something in your home that you made definitely makes you feel proud and I always want to show it off! (Found the stool at another sale and recovered it in matching fabric (actually the cording of the chair).

Ta-DA!! 


I also made a pillow to coordinate with the chair, using the same fabric since I had so much left over. I found this courtesy of Pintrest, called Make It and Love it and now this site has become my go-to for projects. The link can be found here: Pleated Pillow Tutorial. The pillow in total took just a few hours and was so simple to do!


Friday, July 6, 2012

Re-Upholstering Puzzles - Part 1

As I mentioned before, my husband and I have recently become obsessed with estate sales (him more than me, but I'm always up for finding a good deal...) About 2 years ago, we moved from a small bungalow into a larger 2-story home to accommodate our growing family. Because it was our first home, we had the typical "hand-me-down" furniture and a LOT of Ikea things (one of our favorite stores). We were looking for new things to fill in our empty spaces and help decorate and found that a lot of the newer pieces aren't the best quality... enter estate sales. The older "vintage" furniture is much much better quality and you can get things for much less than paying for new. Here are a few things we've found and the "updates we've (I've) made to them.
We found this red wing-back piece at a sale where everything was sold and it was the only thing left...

For $15 we had to snatch it up!

It was faded but the bones were still good. Once we got it home and started tearing it apart, we found it was a Lazy-Boy piece from Art Van (okay, I know, it's not exactly old, but we had to start somewhere). I researched a few places online on how to re-upholster and it didn't seem TOO difficult, and figured my Engineer husband could help me figure out the more challenging pieces. Once I tore the chair apart, the most important thing I realized was to TAKE PICTURES of every thing you take off and label, label, label.

Only 1 of 2 pictures I actually took... excuse the mess

For this chair... I didn't do that, and it took a lot longer than it probably should have. After about a week, it was finally completed and we're pretty happy with the outcome! We updated it with a pretty red fabric we found at JoAnn's, and for my first ever re-upholster, I don't think it's too bad! After finishing this chair, we realized, re-upholstering is essentially a puzzle... everything fits in a certain spot. As long as you keep track of all the pieces, label and keep them in separate piles, everything will go back together the exact same way... I'll continue to show the items we've purchased and updated coming soon!

Sorry for the bad lighting/angle... we don't have the best camera.

Tuesday, July 3, 2012

And Off We Go...

Alright... So I'm WAY late to jump on the blogging bandwagon, but I'm going to give it my best shot. For those that know me IRL, I'm not exactly someone who follows current trends. Let me re-phrase that... I DO follow them, I just come a little late to the party. For example, I recently joined Pintrest (my new best friend) even though apparently its been around for quite some time... I just now got a Kindle (thanks to my sister, who was no longer using her's and offered to let me borrow it... Thanks N!)...

NYC 2005
 To give you a little back story, I'm 27 and married to a wonderful guy, J. We met in high school, started dating in college, and eventually married in 2007. We have two wonderful children, Aiden (3.5 yrs) and Ava (15 mths). I'm a SAHM, and have been since our son was born in 2008. I'm always on the lookout for new projects to do, whether it be cooking/baking, sewing, scrapbooking or crafts with the kids. Enter Pintrest... all my ideas and future projects can be organized in one spot! How is it I didn't learn about this sooner?!? I'm STILL kicking myself...

I am constantly working on one thing or another found on Pintrest, and at the urging of my Husband and Sister-in-Law, I have decided to document it all. My husband and I have also been into estate sales lately, and have acquired quite a few "new" pieces of furniture, making them our own. You may also find a funny quip or story about life with two very active and humorous kids from time to time. I know I'm not the best writer and I may not be very eloquent, but at the very least, I'm hoping you enjoy my projects, and hope you may even attempt them for yourself... because if I can do it, anyone can...